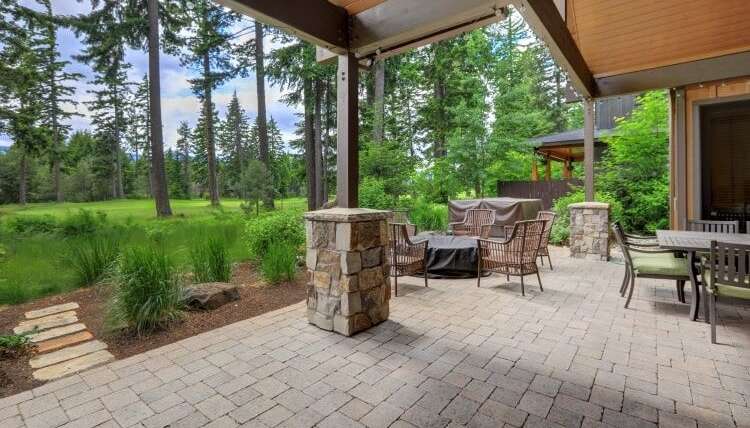

Nothing adds curb appeal to a home like a finished landscaping project. Brick pavers create a clean line and yet warm, natural feel to any landscaping project.
But what do you do when your brick pavers start to wiggle and waver? Loose brick pavers can be a safety hazard whether they’re on a walkway, around a pool, or in a retaining wall. How can you enjoy a hot Floridian afternoon on your patio or around the pool if you’re worried about tripping over a paver?
By the time you’ve finished reading this article, you will understand what causes unstable brick pavers and how you can remedy the problem.
Causes For Unstable Brick Pavers
To understand how to fix pavers, you first must understand what causes unstable brick pavers. When a professional mason does a paver installation job, they begin with a sand bed underneath the pavers. This sand bed creates a stable foundation for the pavers.
When that sand bed begins to erode, the pavers will loosen and become unstable. The problem isn’t necessarily a paver installation issue. Sand erosion comes from traffic, weather, and even basic wear and tear.
As the sand erodes, the pavers will loosen and even start to shift. Here are a few other common causes for paver shifting:
- Quality of the sand
- The slope of the area
- Type of paver
The sand under the paver determines its stability. Courser sand is less likely to erode, so it will last longer and create a more stable foundation.
The type of paver you use matters as well. Some pavers are just prone to shifting more than others.
Finally, the more slop you have, the more likely the pavers are to shift. If you have a steep slope, pavers will shift more easily. Install pavers on the flattest surface possible.
Preventing Paver Movement
You can prevent and fix paver shifting by doing a few different things. If you’re installing pavers currently, whether they’re pool pavers or patio pavers, here are a few things you can do to keep your pavers stable.
Begin With the Foundation
Create a strong paver foundation or base by using a porous material first before you lay down your pavers. When you have a porous material, water will drain more easily from the pavers, and the pavers will remain stable.
If you don’t have a porous material, your pavers will take on water and eventually crack or shift. Your soil can trade, and the entire paver installation can collapse. The following materials make ideal paver foundations:
- Gravel
- Crushed rock
- Crushed stone
- Recycled concrete aggregate
After you lay the proud material, you should pour a couple of inches of sand on top. Then the materials will stay compacted and in place. This layering of porous materials and then the sand will create a sure foundation.
More Sand on Sand
Once you’ve laid the porous material and then sand, tamp the sand down to create a solid base. Then add another layer on top of the compacted base. The second layer of sand gives layers a place where they can snugly lay pavers without disturbing the base.
If you do not have your second layer of sand, the pavers will make depressions on your compacted sand on your porous layer. This can disturb the foundation and create loose pavers down the road.
The extra sand bedding just gives you more support below your pavers and their seams. It also reduces erosion down the road.
Bridge the Gaps
Once you’ve laid your foundation and the second layer of sand, you should fill in the gaps between pavers with more sand. This filling will lock the pavers in place and prevent shifting. It will keep your pavers in line and secure the aesthetic of your paving project.
At this point, many people will use polymeric sand for their joint sand. This sand can last up to 10 years and is designed specifically for joints between pavers.
When pavers shift, not only do they compromise the safety of your paving project, but they also look unsightly. The pavers don’t line up as they should, and the job just looks shoddy.
To fill the gaps between pavers, lay your pavers down, and then cover the entire area with more sand. Sweep the sand so it falls between pavers and fills the gaps.
Use the same course, irregular sand to fill the gaps that you used in your foundation so that pavers are more likely to stay in place. Professional landscapers refer to this coarse sand as joint sand because it works so well to stabilize pavers when you put it in the joints.
Compact the Joints
After you’ve spread sand on the pavers, swept them, and repeated this process several times, you need to compact the sand in the joints. A compacting machine does the most efficient job of compacting the sand in the gaps. It will make sure the sand goes deep in the gaps and keeps your pavers secure.
Professional landscapers lean on machines such as a joint compactor to make the installation process thorough and more efficient.
Seal Your Pavers
After you’ve sanded and packed the joints, you need to seal your paying project. Many landscapers will use a hose to spray down the area. This process helps the sand settle into the gaps securely.
After you’ve hosed down the area, check the gaps and make sure they have adequate sand in them. If you see holes in the gaps, pack more sand in and repeat the sealing process to ensure your pavers stay put.
Then you can apply a solvent-based sealer to bind the paving project. Polyurethane sealers will last five to six years, while acrylic-based sealers will last two to three years.
Paver Stability Matters
When you’re installing or caring for brick pavers, their stability ensures a safer and more aesthetically pleasing environment. The process begins with a stable foundation. The security of your pavers especially matters when you’re placing pavers around the pool or on your patio.
Are you on the hunt for a great landscaper who can make brick pavers come to life? If so, contact us. Our expert landscapers can create something from scratch or bring life to your old, loose pavers.
Stop searching for “paver installers near me” and give us a call today.