
Did you know paver installation on top of plain dirt is a terrible idea? As it turns out, there are many things you shouldn’t do when laying paver stones.
Still, hardscaping can look fantastic. You can arrange all types of pavers in any way you want. Hard stone is also better for outdoor seating areas. Soft grass and dirt sink underweight, and furniture may become unstable.
The guide below will provide helpful tips and tell you what not to do during your DIY paving landscaping project.
Choosing the Right Type of Paver
Picking paving stones solely based on looks is not a good idea. First, you should always price how much pavers cost. You don’t want to have your heart set on a particular material, only to find out it’s far outside your budget.
Although, if you want a certain kind of paver badly enough, there’s no shame in haggling for the price. You may receive a good deal if you’re willing to ask.
While checking the price, find out if there’s enough material for your landscaping project. You should measure the area you want to pave before looking for paving material.
Sometimes, cheaper paving stones sell out far quicker than their expensive counterparts. Considering multiple types of pavers for your hardscaping as backups is not a bad idea.
Consider Pavers for Your Climate
All types of stone don’t work in every climate. Brick is porous and degrades rapidly in wet areas. If you live somewhere that’s constantly rainy, brick may not be the best choice.
Brick is better in moderate climates. You can choose brick if that’s what you want but be prepared to replace a few every year or so. Stone and cement are best suited for harsher climates.
Plan Paving Patterns Before Installation
Please don’t wait until you’ve begun your project to start planning how it will look. If you want a pattern, consider it while looking for paver types.
Firstly, it may become hard to find a specific color or stone you need while planning mid-installation. Even if you find what you’re looking for after you start, you open your home improvement idea to mistakes.
Rushed planning often leads to poor quality, leaving you with an inferior project.
Dig a Deep Enough Base
Paver installation involves a lot of digging. You must dig deep so you have enough space for your gravel foundation. Six to ten inches deep is the recommendation for walkways and driveways.
If you live somewhere cold or with wet soil, dig about two to four inches deeper than recommended. You’ll need extra gravel to compensate for the weather and soil conditions.
Don’t Backfill with Only Dirt
Technically, you do use dirt for paver installation foundations. The problem is if you only use dirt for your base. Dirt is soft and compacts easily. Dirt can’t create a solid grip on the pavers; they’ll shift and slide apart.
If you want an even, stable base, use gravel. Gravel is more solid and won’t settle or slide the paving stones out of place. Road base gravel is a good choice for your base.
The road base gravel contains the proper ratio of course and fine grains for stability. Once you lay the gravel, smooth down some concrete sand for the pavers to settle inside.
Don’t Forget to Compact the Base
For clarification, dirt compaction is terrible because it’s an automatic process that breaks apart your even and stable paver installation. The base compacting we’re talking about refers to smoothing the base you’ve built.
Your paver installation base needs flattening, so the stones lay evenly. An unsmoothed foundation results in bumpy, uncomfortable hardscaping.
Properly Lay Bedding Sand
Think of bedding sand as an extra layer of glue. Even with a properly installed base, you need more to keep your pavers still. Bedding sand also serves as additional leveling.
If you install bedding sand well, your pavement project will be smooth and even. Bedding sand that isn’t correctly spread can result in gaps and voids in paved surfaces.
A technique called screening helps lay bedding sand flat. Screening involves spreading the sand, then flattening it by running bars over the pile until it’s an inch thick.
You can use wooden planks for your smoothing bars. Make sure that the bedding sand is only an inch high. If the sand is thicker, your stones will shift or sink.
Lay Your Pavers Properly
There is a right way to lay your pavers. First, you put your paver so the backside aligns with the front of the previously applied stone. Then, you push the stone onto the other until you hear a “click” noise.
Once the stones click together, drop the one you’re holding. The clicking noise means the pavers are flush with each other. It’s crucial you lay the paving stones the right way.
Don’t Lay Your Pavers in a Straight Line
We’re not saying your landscaping project must look a certain way. But we are telling you not to focus so much on a uniformity that you inadvertently ruin your paver installation.
Laying pavers in a straight line doesn’t work. Even if you like how it looks, linear paving patterns aren’t structurally sound and will shift as time passes. You’ll end up with uneven areas and messy, unsafe hardscaping.
Don’t Worry Over Paver Installation
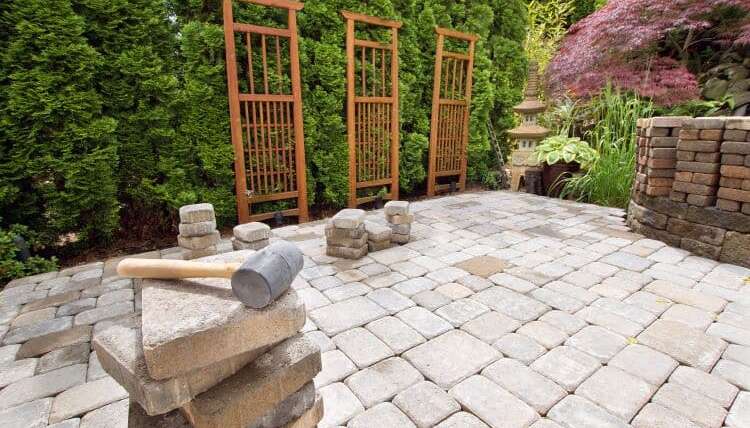
Paver installation is a DIY project that most people can do over a few days if they’re willing to work at it. Installing paving stones is a quick and easy way to improve your landscaping.
But there are still plenty of ways to install pavers wrong. If you’re worried about improper installation, consider giving us a call. We can handle all kinds of hardscaping, from driveways to pool patios.